Showing posts with label Thrifty Crafts. Show all posts

Tuesday, May 1, 2012

A Love Story of A Dresser

For about two years I had been on the hunt for a dresser, one that I could make an affordable DIY project, hard work that has a satisfying finish. I had been using a dresser that was a hand-me-down. It was originally white, dirty, and damp from sitting in a garage. I painted it a vivid green in an attempt to brighten up the dark, dingy room that I was living in at the time. However, once I moved into my current room which is large, sunny, and has a wall that is painted a cheery yellow-orange color, the dresser no longer suited my needs. Plus I was fed up with the cheap compressed wood drawers that never seemed to fit correctly. That dresser actually began to depress me when I looked at it; it was proof that environmental surroundings can play a role in a person's mental state. It was time to find a bigger and better replacement, no matter the cost.

Before


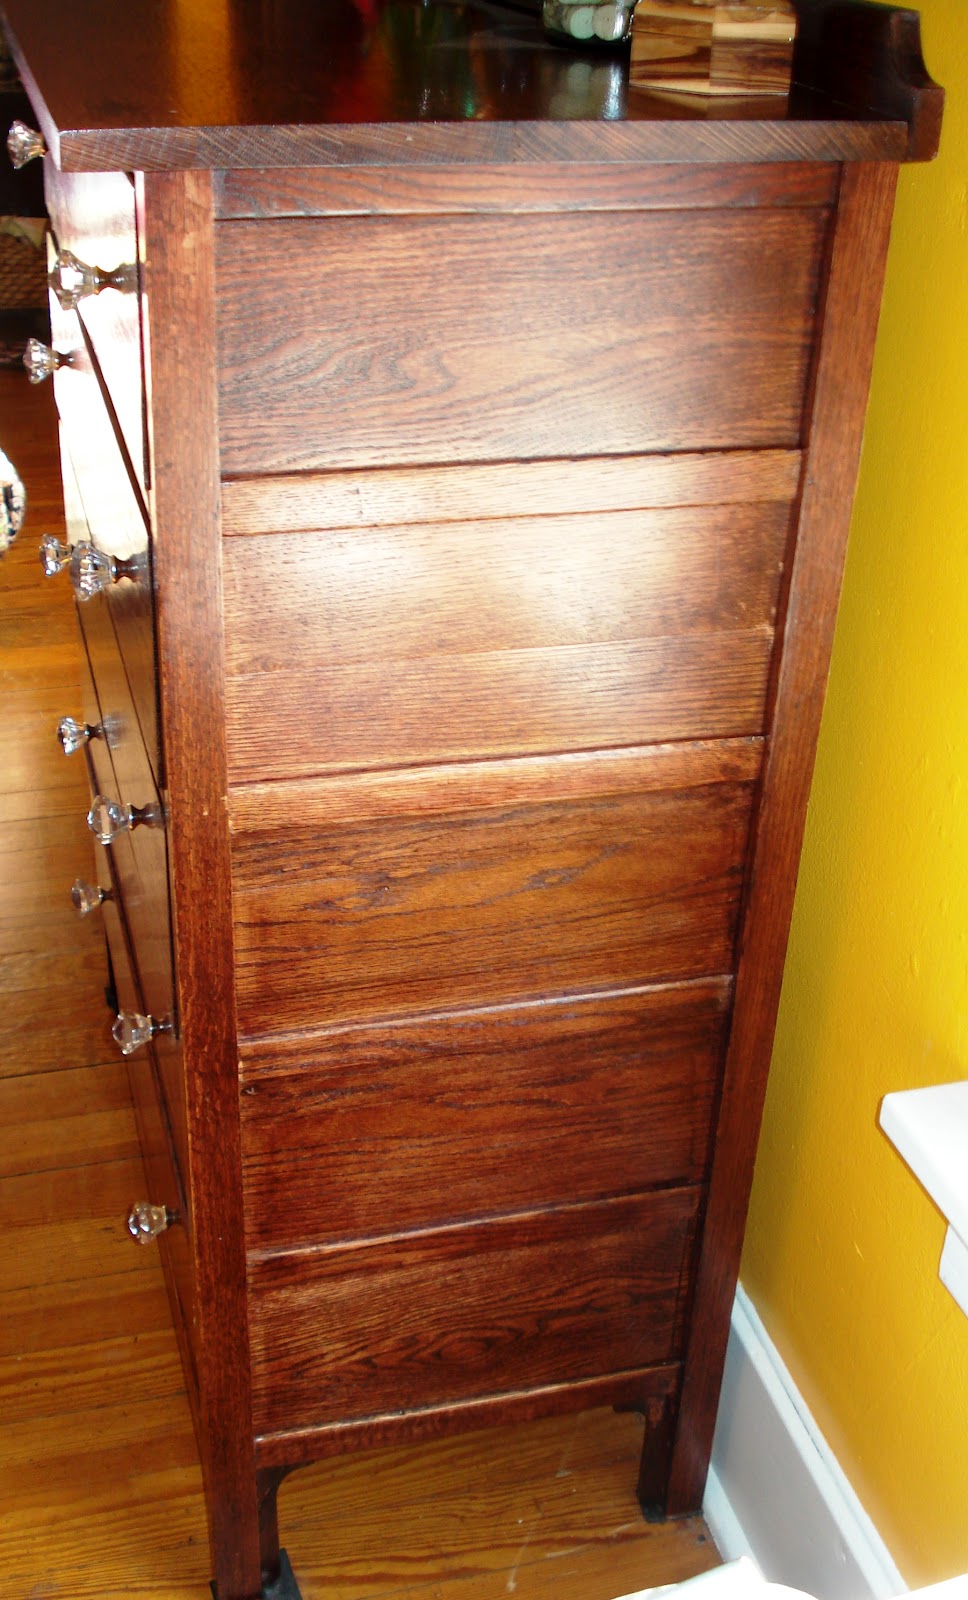
I finally found the perfect dresser on Craigslist, already stripped of paint. It is oak from the 1890s. It has wonderful features: five panels on the sides, skeleton key holes in each drawer, and a strip of wood where a mirror once was attached. I purchased this dresser at a reasonable price with a large project of sanding, staining, and finding the perfect hardware ahead of me. I was under the impression that I was skilled enough to bring this 1890s dresser back to life. When my dad came for a visit, he knew that this antique needed a lot more work than I was skilled to do. Luckily my parents are good friends with a wonderfully talented carpenter and woodworker, Mike. My dad insisted on taking it back to Janesville to let Mike examine it.
Dissecting the Dresser

Reassembling the Dresser

Sure enough the dresser needed more work than I was aware of. The back of the dresser needed to be replaced, the wood needed to be sanded with a machine (not by hand, as I was picturing), the five panels on the side needed to be removed so all of the previous paint thinner could be scraped out, and the bottom of the drawers needed to be replaced. The whole thing needed to be glued back together properly. Mike sanded, deconstructed and reconstructed, and replaced parts of the dresser making it more sturdy and reliable. I learned a lot from Mike; he even pointed us in the right direction for types of stains and techniques to use.

After my mom and I spent a weekend staining the wood a dark brown with a twinge of red and applying multiple coats of polyurethane during the next week, the dresser turned out to be just what I had pictured. We even found some crystal hardware at Hobby Lobby which gave the dresser a hint of sparkle and completed its 1890s feel. My dresser is now a focal point of my room, instead of something that I try to hide. I am proud to show it off and tell people that I refinished it. Of course I could not have done it without the help of Mike, the talented carpenter, and my mom's hard work. I appreciate it, and I know that it will be a piece of furniture I will have as long as it lasts. Who knows, maybe it will outlast me and become a beloved dresser in someone else's home. It was worth all of the hard work to find my dream dresser!

After

Notice the Side Panels
It Looks Perfect in My Room!

What does your dream furniture look like?


Sunday, February 12, 2012

Turn A Purse Into A Creative Wall Decoration

When one of my old roommates was moving out of the house she was gathering together items she wanted to get rid of. One of the items was a purse with scenery of Venice, Italy decked out in sparkly rhinestones and big black handles. I loved the look of it but wouldn't want to use it as a purse because of the uncomfortable bulky plastic handles. Yet, I didn't want to discard it either because I have a personal attachment to Venice; I spent a few days there when I was abroad.
Enjoying A Ride On A Gondola

It remained hidden in my closet untouched for quite a while until I finally had an idea of how to display it on my wall. I went to Hobby Lobby and found a hook that compliments the purse and found the perfect spot to hang my Venice purse, right next to the Venice shadowbox I had made to display a masque I had bought as a souvenir. I hung the hook and stuffed the purse with tissue paper so it looks like it is full. It was the perfect addition to my wall, not to mention a cheap and resourceful decoration. I enjoy the sparkle and character it brings to my room.
The Hook
The Venice Purse
The Results


Soon after I hung the purse my other roommate gave me a wire Eiffel tower art piece that I hung beside the purse. My wall was complete. It is still my favorite wall to look at in my room. It is unusual, artistic and shows some of the places I have traveled to.


My Favorite Wall In My Room
What kind of purse do you not like to use as a purse but can't part with because of its beauty? Would it look stunning on your wall? 

Thursday, January 5, 2012

T-shirt Tie Scarf

T-shirt Tie Scarf


The T-shirt scarves have become a really popular way to make something old into something new. I found an old brown shirt that I haven't worn in over a year, maybe because it says "Everyone Loves a German Girl" on it and I figure I should at least try to look my age. I decided to use an old burgundy tank top that doesn't fit anymore to compliment the brown.

Supplies needed:

1 old T-shirt
1 old tank top
Pair of fabric scissors

Directions:

1. Lay the shirt and tank top flat on the table or floor.

2. Starting with the t-shirt first, cut off the bottom seam.

3. Cut the the t-shirt into 1 to 1 1/2 inch strips, beginning at the bottom, up to the collar. Cut out the collar and the sleeves. Set the sleeves aside to use later.

4. Once the strips are cut pull on them to make them curl in on themselves. Set the strips aside.

5. Begin cutting the tank top. Cut the bottom hem off. I cut these strips along the width so they were longer.

6. Sort the strips by color and length.

7. Cut the sleeves from the t-shirt into small strips; set  aside.

8. Now tie each end of the strips together and wrap the loop around your hand. Depending on how many times you wrap the strip around your hand it will make the loop smaller or larger. I tried to make mine as random as possible.

9. Use the small strips from the sleeve to tie the loops together. I placed my colors together randomly, but be creative and make a pattern or whatever you want.

10. Tie it up. I made mine a circle scarf, but an open-ended scarf would have been just as cute.

11. Wear it. Wrap it around your neck and show it off. I wrapped mine around 3 times.For a tighter look I can opt to wrap mine 4 times.

This was a fun, easy, cheap, versatile craft. I plan to make more variations of a t-shirt scarf. I already have the shirts picked out. I hope you have fun with this one; there are endless possibilities.