Saturday, December 8, 2012

Homemade Chicken Stock


I am a sucker for good homemade soup; it is very satisfying and comforting. With fall ending and winter approaching I decided to make a large portion of chicken stock to freeze and use for soups as I need it. Previously, I had prepped a whole chicken in the Marinade Express, cooked it, carved the meat off, and kept the carcass in the freezer until I was ready to cook up a storm. Although this recipe takes 3-4 hours of simmering time it is definitely well worth the wait. This chicken stock is by far the best I have ever had. Prepping the chicken in the Marinade Express makes a world of difference in pure, fresh stock.That step removed impurities, allowing terrific taste to be highlighted. You can anticipate how much better this stock is going to taste compared to any prepared without the benefit of the Marinade Express when you do not have to skim as much of the usual "scum" that ordinarily rises to the surface of the pot when simmering the carcass. That's what the Marinade Express is all about--infusing antioxidants in (whether marinade-flavored or unflavored), and flushing impurities, contaminants, and free radicals out. The result is divine taste and healthier eating!   Since this stock is so flavorful I would recommend using it as the base of soup that is simple, like chicken noodle, allowing the taste of the stock to shine through. Save the bland, store-bought chicken stock for tomato-based soups.

Ingredients:

1) Carcass from a whole chicken or bones from about 3 pounds of chicken parts.
2) 1/4 cup vinegar
3) 2 teaspoons sea salt
4) 1 onion, unpeeled but well-washed (preferably in the Marinade Express) & quartered (the peel adds color to the stock)
5) 1 carrot, unpeeled but well-washed (preferably in the Marinade Express) & quartered
6) 1-2 ribs of celery with leaves, well-washed (preferably in the Marinade Express) & quartered
7) 1 bay leaf

Directions:

1) Process the whole chicken (or chicken parts) in the Marinade Express. Use the Express unflavored MX Marinade if you prefer to highlight the natural flavor of chicken, or select one of the 10 flavored MX Marinade blends recommended for chicken at Marinade Express. Spin-tumble for 30  to 45 minutes. Remove from the appliance and cook according to your preferred method. Remove the meat from the carcass and freeze the bones if you will be making the stock later.
2) Rinse the vegetables under running water to remove any surface dirt, then place the onion and carrot on one side of the divider ribs in the Marinade Express, and the celery on the other side. Use the Express unflavored MX Marinade to remove bacteria, pesticide residue and other contaminants. Spin-tumble about 4 minutes, then quarter them.  (Efficiently prep additional vegetables needed for other use in this same batch. Carrots are then more nutritious, as you can avoid peeling them. Pat dry and refrigerate.)
3) Place the (defrosted) carcass and the vegetables in a stock pot with a tight-fitting lid and add enough cold water to just barely cover. Add the vinegar & salt (to extract the calcium and juices from the bones).
4) Bring slowly to a simmer. Simmer gently so bubbles just break on the surface. Skim any remaining impurities that arise as "scum" during the first 1/2 hour, but there should not be much.
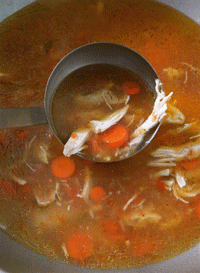
5) Cover the pot and simmer gently 3 to 4 hours.
6) Remove from heat and strain the stock through a fine mesh sieve and discard the solids. If you can detect any odor of vinegar, return the strained liquid to the pot and boil a few minutes until no vinegar odor remains.
7) Refrigerate the stock overnight and remove any fat that has solidified on top.
8) Use in your favorite recipe, or freeze in portions for use later, adding fresh vegetables and seasonings to taste.


Monday, November 5, 2012

Vegan & Gluten-Free Quinoa-Stuffed Peppers

One of my favorite dishes during the Thanksgiving feast is stuffing. When I saw this twist on traditional stuffing, substituting nutritious Quinoa for the bread,  I had to try it. Although it doesn't happen often, I find it fun to cook a vegetarian dish once in a while. My body craves high amounts of protein at every meal. Usually my vegetarian dishes have lots of cheese, or eggs. This is probably the first vegan dish that I tried that has been able to satisfy my hunger because this amazing little grain is packed full of protein, vitamins, and fiber. Not to mention, it is gluten free. If you've never tried Quinoa, I highly recommend it: takes only 10 to 15 minutes to make, it is more flavorful and nutritious than rice and it is very versatile and filling!


 For the first time making this recipe I omitted the cranberries because Paul was eating with me and cranberries don't agree with him. After chowing down we both determined that the cranberries would have added a necessary flavor dimension, an extra sweetness to compliment the green apples. Since cranberries weren't an option for us, I cursed myself for not thinking to substitute raisins, which also would have been perfect. Another variation I thought would be delicious if you don't want to go the vegan route is to add some ground turkey or lean ground sausage. The fun part about this dish is that it is a creative, healthy spin on a traditional American comfort food, which leaves room for experiment and personalization. I will definitely be visiting this deliciously, satisfying recipe again!


Vegan & Gluten-Free Quinoa-Stuffed Peppers Adapted from Hyvee Seasons Magazine:

Ingredients: Serves 6 (1 bell pepper each)
1 cup low-sodium, gluten free vegetable stock
1 cup fresh apple cider
1 teaspoon fennel seed, lightly crushed
2 tablespoons olive oil
2 cloves garlic, minced
1 1/4 cups diced celery
1 onion, diced
2 granny smith apples, cored and finely chopped
Salt and Pepper to taste
1/2 cup dried cranberries (or raisins)
2 tablespoons finely chopped fresh sage (or 2 tsp.crumbled dried leaves)
1/2 tablespoon fresh thyme (or 1/2 tsp.dried)
1/2 cup chopped pecans (optional)
6 medium green bell peppers, tops cut off and hollowed

Directions:
 1) Prep the bell peppers in the Marinade Express, using the unflavored MX Marinade for 5 minutes. This removes bacteria, dirt, and pesticides from veggies and fruits. Drain the peppers inverted..
 2) Preheat oven to 350 degrees. In a medium saucepan, bring the vegetable stock, apple cider, and fennel seeds to a boil. Add quinoa, cover and allow to simmer until all the liquid is absorbed, about 15 minutes.
 3) Heat olive oil in a large skillet over medium heat. Saute the onion and garlic until the onion becomes translucent, about 10 minutes. Add celery, apples, salt and pepper for about 5 minutes or until the vegetables are slightly tender.
4) Combine quinoa and sauteed vegetables and fruit. Stir in cranberries (or raisins), thyme, sage and pecans. Spoon stuffing into bell peppers then stand upright in a baking dish.
5) Bake for 30 to 35 minutes or until peppers are tender and stuffing is heated through. Serve and enjoy!


Monday, October 8, 2012

Brazilian Chicken Soup

With the leaves changing to vibrant oranges, reds, and yellows there also comes a chilly threat of winter. The crisp autumn air reminds me that it is officially soup season! I love the way a bowl of hot soup warms you from the inside out. It comforts the soul. I truly believe a hearty, delicious bowl of soup and a steaming cup of tea help us who live in the Midwest survive our bitterly cold weather-- at least they make a big difference for me. Expect many more comforting soup and stew recipes to come.

I found this Brazilian Chicken soup recipe in my trusty Soup's On cookbook. It appealed to me because you cook a half of a chicken in water which creates its own broth. Then you pull the moist chicken meat off and put it directly into the soup. Because the Marinade Express process removes impurities from the chicken, the broth will not require skimming to remove the impurities that usually form as a scum in soup broth. The broth is subtly flavored; I added some extra spices to bump up the flavor complex. The carrots are a great way to make this soup a meal in one.

(Image)

Brazilian Chicken Soup Adapted from Soup's On cookbook (6 servings):

Ingredients:

Half of a 3 to 4 pound chicken
Santa Fe MX Seasoning mix
4 medium ripe tomatoes, peeled, seeded and chopped
1 medium onion, chopped
2 bay leaves
2 stalks celery with leaves, chopped
1 sprig fresh parsley, minced
1/2 cup uncooked brown rice
salt and pepper to taste
1 tablespoon cumin
1 tablespoon curry powder
1 tablespoon smoked paprika

Directions:
1. Process the whole chicken in the Marinade Express for 15 minutes with the Santa Fe Salsa Mx Seasoning.
2. Reserve 1/2 of the chicken for another use and place the other 1/2 into a large stock pot with the bay leaves, tomatoes, onion, celery, and parsley. Add 2 quarts (8 cups) water, cover with lid and bring to a boil. Reduce the heat to low and cook until the broth is flavorful, about 1 hour. Remove the soup form the heat.
3. Remove the chicken from the stock and let it cool. When it is cool enough to handle, use a fork to pull the meat from the bones. Set the meat aside and discard the skin. I put the bones in a freezer bag to save for another soup later.
4. Put the stock and vegetables through a food mill (or use an immersion blender) to create a thick chicken stock.
5. Return the stock to the pot, add the carrots, rice, salt & pepper, cumin, curry, and smoked paprika and 2 cups water to the pot. Cook on medium heat, reduce to a simmer for 30 minutes, until rice is tender. Add the chicken in for the last 10 minutes to heat. Serve hot and enjoy.


Thursday, October 4, 2012

A Postscript To Crispy Oven Fish Fry With Mushy Peas: The Proposal Story

My apologies for the lack of blogging in the past several weeks. I think you will understand that I have been busy elsewhere when I share my exciting news. On September 8th Paul popped the question! Even though the subject of marriage had come up, he had led me to believe that we wouldn't be getting engaged for several months. Therefore the day of the proposal was a huge surprise.


My Gorgeous Ring!


It was Saturday, September 8th, which happens to be our 2 year 4 month anniversary (who's counting?). Normally we barely acknowledge our monthly anniversary so our Saturday was just a normal one. Paul wanted to go hiking at Swiss Valley, a gorgeous nature preserve park with hilly valleys, a woodsy area, and a stream running through it. This is not an unusual activity for us. At 6:00 I put on my "attractive" hiking clothes, and we hiked for about an hour to our favorite spot, where a boulder rests on the top of a wooded valley. Swiss Valley has become "our" place: it was where Paul took me on our first date together; it is also where he asked me to be his girlfriend. Paul will not hesitate to remind me that my answer that day was,  "No". But two weeks later, on the 8th,  we were officially dating. This particular boulder is also where I later told him for the first time that I loved him.


As I stood in front of him on the boulder this chilly fall night of September 8th enjoying the scenery, Paul asked me to turn around. He had to ask me twice because I didn't want to take my eyes off one of my favorite places. When I finally turned around I saw a glimpse of something shiny in a black box. I barely looked at it but I knew what it was. The way he asked me was simple but perfectly sweet, "Emily, I love you. Will you marry me?" I was so excited that it took me a while to realize that he never knelt down on one knee. However,  I can forgive him since he was on an uneven boulder. I wouldn't want my new fiance to literally fall head-over-heels for me and break his thumb again.

It is ironic that Paul proposed two days after I made the Crispy Oven Fish Fry with Mushy Peas recipe.  Paul, who had never liked fish, loved the dish. It must be proof that you can speak to a man's heart through his stomach, especially when you prep your food in a Marinade Express! We are so excited for our wedding next summer and I am blessed to be marrying my best friend. Oh, and how perfect is it that we get to preserve our dating / proposal anniversary of the 8th? Our wedding date will also be the 8th.


At a wedding we attended in July I caught the bouquet and Paul caught the garter. Guess that superstition is true!


Thursday, September 6, 2012

Crispy Oven Fish Fry with Mushy Peas

It is rare to find me in front of the TV, especially alone. If I watch TV it is usually a worthwhile movie, shared  with someone as a way to relax. The few times I do watch TV alone it is always on the Food Network channel. I feel I learn something from every episode that I can apply to my cooking. Rachel Ray, 30 Minute Meals is one of my favorite shows. This particular time I caught her cooking Crispy Oven Fish Fry with Mushy Peas and knew I had to try it immediately. Rachael Ray originally used Cod but I had recently bought Tilapia because it was on sale. This was a perfect way to use it. I have to admit, I was a little leery to try the Mushy Peas, but let me tell you they were wonderfully refreshing and savory, the perfect vegetable to go with the Crispy Fish. Paul was also skeptical to try this recipe because he has never liked fish. He kept an open mind and fell in love with the dish. Of course I prepped my Tilapia in the Marinade Express which helped to remove any fishy taste as well as the phosphates in which it was previously soaked (as commercial fish is, to keep it moist on the boat.) Rachael's recipe for the light, yet flavorful breadcrumb batter is to die for. The smell of it cooking in the oven permeated throughout the whole house making my roommates curious and jealous of our dinner. This dish is a wonderful way to get your kids (of all ages) to eat peas and fish, plus it is figure-friendly and easy to make. You can't beat it!
This picture doesn't do it justice, I promise it's delicious!

Crispy Oven Fish Fry with Mushy Peas:
Adapted from 30 Minute Meals, Rachael Ray

Ingredients:
 Havana Mojo Marinade by Marinade Express
1 1/2 to 2 pounds Tilapia or Cod
5 tablespoons butter
3 cups Panko bread crumbs
1 tablespoon seafood seasoning (such as Old Bay)
1 tablespoon granulated onion powder
1 tablespoon granulated garlic powder
Zest of 1 lemon or lime
2 tablespoons dried thyme leaves
2 tablespoons finely chopped green onions
2 large egg whites, beaten until frothy
1 cup packed fresh mint
1 cup flat-leaf parsley leaves (I used dried)
3 cups freshly shelled peas or frozen peas, defrosted and dried
1 tablespoon olive oil
2 large shallots, finely chopped
2 cups chicken stock
Pepper and salt to taste
Malt vinegar (optional)

Directions:
1) Prep the Tilapia in the Marinade Express using Havana Mojo Marinade for 7-8 minutes.
3)Preheat oven to 400 degrees; arrange a baking rack over the top of a baking sheet.
4) Melt 4 tablespoons butter over low heat in a small pot. Put bread crumbs in a shallow dish, douse with the melted butter, stir to combine. Season with seafood seasoning, onion powder, garlic powder, zest, thyme, and green onion. Toss ingredients together well.
5) Clean and pat the fish dry, season with salt to taste. Coat the fish in egg whites, then gently press the fish into bread crumbs to coat evenly. Arrange on baking rack. Place the fish on the center rack of the oven. Cook for about 15-20 minutes, or until the fish is flaky. (Remember that food prepped in the Marinade Express cooks faster than usual by about 20 %, so expect it to be done in 15-16 minutes rather than 20).
6) While the fish is cooking add parsley and mint to a food processor, pulse to finely chop, then scrape into a bowl and set aside. Using the same food processor,  add the peas and pulse until very finely chopped.
7) In a medium saucepan, heat 1 tablespoon of olive oil and the remaining butter over medium heat. Add the shallots and saute for 5 minutes. Add the chicken stock and peas, bringing to it to a bubble over medium-high heat. Cook the fresh peas for 10 minutes. If using frozen peas cook for 6 to 7 minutes. When most of the liquid has evaporated, season with salt and pepper and stir in the mint and parsley. Remove from heat.
8) Spoon mushy peas onto each plate, then place a piece of crispy fish on top. Top with malt vinegar as desired. Serve immediately!

Wednesday, August 29, 2012

Shrimp Tacos With Greek Yogurt Salsa

I love shrimp tacos, a summer twist on a traditional Mexican dish. There are so many wonderful recipes for shrimp tacos that I can't wait to try. For my first experience of making them, I wanted to keep it simple. I actually adapted this recipe from a fish taco recipe that used Tilapia. I created a Greek Yogurt Salsa for the topping. By now you know my love for Greek yogurt as a healthy substitute for sour cream and other ingredients. It was the perfect experiment. The Greek Yogurt Salsa was surprisingly creamy and added a unique flavor. It is very versatile; I think black beans and/or corn would add another dimension of flavors to the yogurt sauce. Be creative with this one!

Processing the shrimp in the Marinade Express makes a noticeable difference with shrimp and fish. It helps to eliminate of the "fishy" smell and taste. Santa Fe Salsa MX seasoning highlights the flavors for these tacos with cilantro, tomatoes, peppers, and more. It is one of my favorite flavors to work with.


Shrimp Tacos With Greek Yogurt Sauce


Shrimp Tacos Adapted from My Recipes.com

Ingredients:

For Tacos:
MX Seasoning: Santa Fe Salsa    
Mexican shredded cheese mix (or cheddar)
1 pound fresh shrimp
1/2 white onion, cut into strips
3 to 4 mini sweet bell peppers cut into strips (any colors you prefer)
8 six inch flour or corn tortillas
1 small jalapeño thinly sliced (optional)
salt and pepper to taste


  • For Greek Yogurt Salsa:
  • 1 cup plain Greek yogurt
  • 1 teaspoon Cajun Seasoning
  • 1/3 cup salsa
  • 3 tablespoons fresh cilantro, minced
  • zest of 1 lime
  • salt and pepper to taste
Directions:

1) Peel shrimp, removing legs and tails. Process the shrimp in the Marinade Express for 7-8 minutes.
2) While the shrimp is being processed in the Marinade Express cut up the onion, peppers, and cilantro.
3) In a large sauté pan that has been greased sauté strips of onion and peppers. Cook over medium heat, stirring frequently.
4) Add shrimp after the onion and peppers have cooked for 3 to 4 minutes. Keep a close eye on the shrimp; don't overcook or they will become rubbery. Remember that proteins prepped in the Marinade Express usually cook faster. Cook them just until they turn a whitish-pink color.
5) In a small mixing bowl add Greek yogurt, Cajun seasoning, salsa, cilantro, lime zest, salt and pepper. Mix thoroughly.
6) To assemble the taco add cheese, followed by shrimp and pepper mix, then top with Greek Yogurt Salsa. Garnish with thin slices of jalapeño, if desired, and cilantro. Enjoy!

Thursday, August 23, 2012

Green Goddess Salad With Mint Yogurt Dressing

My mom bought me this awesome cookbook, Delicious Salads, An Irresistible Collection of Perfect Salads by: Love Food. This salad cookbook has unique, artistic salads. Each recipe has gorgeous colorful photographs that make my mouth water every time I look at them. This was the first recipe I have made from this cookbook. It was a great salad to have with my Perfect Steak and Mushrooms dish. I can't wait to try more recipes from this book; I highly recommend this cookbook to help spice up your salads.

(Image From Amazon.com)

Green Goddess Salad With Mint Yogurt Dressing is not your typical Green Goddess recipe. It has a perfect marriage of green veggies. The crunchy green peppers, zucchini, and green beans are perfect with the bold, spicy watercress. The mint yogurt dressing is the ultimate creamy topping; it accommodates all of the veggies, it is simple to make, and adds protein and calcium to your salad.
The Perfect Steak & Mushrooms With Green Goddess Salad


Green Goddess Salad With Mint Yogurt Dressing
Adapted From Delicious Salads

Ingredients:
Serves 4

2 zucchini, cut into thin sticks
1 1/2 cup green beans, cut into thirds
1 green bell pepper, seeded and cut into strips
1 bunch of watercress

For the Dressing:

1 cup plain yogurt or Greek yogurt (Note, using Greek will make it very thick)
1 garlic clove, minced
2 tablespoons chopped, fresh mint
 (I used peppermint because it's growing on my porch; any mint will be great)
pepper to taste

Directions:

1) Cook cut zucchini and beans in a pan of lightly salted water for 7-8 minutes. Drain the water and shock the veggies in an ice bath to stop the cooking process. This also helps to keep their bright green color.
2) Mix zucchini and beans with green bell pepper strips together in a large serving bowl.
3) Add watercress on top right before serving.
4) To make the dressing, mix yogurt, garlic, and mint in a small bowl. Season with pepper to taste.
5) Put dressing into a small serving bowl with a spoon for guests to add to their salad as they wish. If there is any salad left over, it keeps fresh better if the dressing is separate from the salad.


Green Goddess Salad With Mint Yogurt Dressing


Saturday, August 18, 2012

The Perfect Steak and Mushrooms

A juicy, meaty steak prepped in the Marinade Express and grilled to perfection, with savory mushrooms on the side is my ultimate comfort food. It fills me with memoires of special summer days or celebrating my birthday. It's a time to share with family and friends. To me a good steak isn't just a way to satisfy hunger pains, it is an experience. There is no better way to enjoy a steak than when it is prepped in the Marinade Express and grilled on a charcoal grill. There is no need for A1 steak sauce if you follow this recipe. The steaks are juicy, tender, and fabulously flavorful.

The perfect steak:
Ingredients:
A good cut of steak (I used sirloin)*
MX Seasoning Prime Beef


Directions:
1) Process the steak in the Marinade Express for 5 to 10 minutes.Let it rest in the refrigerator for 15-30 minutes.
2) Cook steak on the grill for 5 to 8 minutes on each side, depending on how well done you like your steak cooked. Remember that the increased juiciness the Marinade Express infuses into the meat causes it to cook 20 to 30 % faster than normal, so watch your steak and do not overcook!


*There is no need to have to break the bank to enjoy a high quality steak, just look for the sales. You may need to prepare it right away or freeze it.

Delicious Steak and Mushrooms


To accompany my steak I made some savory mushrooms. I am a mushroom junkie. I love them raw in a salad, cooked in butter, and in mushroom soup. I can never get enough of them. My Aunt Mary introduced me to my new favorite way to fix mushrooms. They are just as easy but with a few extra ingredients they are scrumptious!

Ingredients:
1/2 stick of butter
2 cloves of garlic, minced
1 yellow onion, julienned
1 carton of baby Bella mushrooms, sliced
1 teaspoon of Better Than Bouillon, beef base (it comes in a jar)
1-2 tablespoons dry red wine (I used Cabernet Sauvignon)
1/2 teaspoon of flour (or corn starch dissolved in 1 teaspoon of the wine)

Directions:
1) In a large saucepan melt butter. Add the garlic and cook for 1 minute, until it becomes fragrant.
2) Add yellow onion, cook for 2 minutes, until they begin to shrink in size.
3) Add mushrooms, stirring frequently until the mushrooms begin to brown.
4) Stir in Better Than Bouillon beef base until it is mixed well.
5) Add the red wine, one tablespoon at a time. Let the wine cook into the mushrooms a little before adding more. You can always add more wine to the mushrooms but you can't remove it once it's added.
6) Add a pinch of flour (or dissolved corn starch) and stir until the sauce thickens. I used about a 1/2 a teaspoon for my batch. Depending on proportions of ingredients, you could use more or less.
7) Serve while the mushrooms are hot; enjoy the deliciousness.

To add some greens to this meal I made Green Goddess Salad With Mint Yogurt Dressing. It has some beautiful green veggies, topped with spicy watercress and a creamy mint yogurt dressing. It was the perfect salad with this steak.


Wednesday, August 15, 2012

Raw Energy Balls

Wow! It has been a whirlwind of a summer. Between my family vacation at the end of July, weekend trips with friends, and work, I have packed a lot into the second half of my summer. I am making a new vow, to blog more frequently in the next couple of months! Even though I have been behind on my posts, I have still been cooking up a storm. Be excited for a plethora of mouthwatering recipes I have on my list to blog about.

Raw Energy Balls- there is no better name for them. They are quick and easy to make, they are delicious and are packed with protein, Omega-3 fatty acids, natural fruit sugars, and antioxidants. They are a little ball of energy, the perfect balance. I have taken them on road trips or to work for an easy snack. My favorite time to enjoy them is first thing in the morning before my run. Just one ball gives me enough substance to last me through my workout; at the same time there isn't too much food jostling around in my stomach.

Raw Energy Balls In All Their Glory!

Raw Energy Balls
Adapted from Pink to Green

Ingredients:
1 cup rolled oats
1/2 cup pepita (shelled pumpkin seeds)
1/2 cup raw, unsalted almonds
1/4 teaspoon cinnamon
1/4 cup shredded coconut
2 tablespoons chia seeds
Pinch of salt
1 teaspoon vanilla
7-9 dates (pitted)

Directions:
1) Blend  oats, pepita, almonds, cinnamon, coconut, chia seeds, and salt in a food processor until fine.
2) Add vanilla. Add the dates one at a time, blend each date until the mixture easily sticks together.  If needed add some water to help the mixture stick more.
3) Roll into balls and store in the freezer. You can enjoy them directly from  the freezer; they don't completely freeze because of the fat from the nuts. They are also delicious at room temperature.


Adding the Dates To the Nut Mixture


The dates really add a nice sweetness to the Raw Energy Balls. I have viewed recipes that have mini chocolate chips or cacao powder in them; this makes them more of a healthy dessert substitute. I have experimented with adding almond butter, a dash of cardamom, and flax seeds. Be creative. I know I will. After you make them the first time you will be hooked!

Tuesday, July 10, 2012

Watermelon Slush

This past week we had insanely hot days. The temperature felt like 120 degrees plus humidity. It was torturous to venture outside even for a short period of time. I love summer and I love hot weather but this was unbearably hot, so hot that all I wanted was some ice cream. To cool down and stick to my healthy goals I found a recipe for Watermelon Slush. It's easy, tasty, refreshing, healthy, and the perfect festive treat for the 4th of July.

Recipe adapted from Hyvee Seasons
Watermelon Slush

Ingredients:
8 cups of seedless watermelon
1 cup water, divided
1/4 cup lime juice
1/4 cup agave nectar
3 cups Sprite

Directions:
1) Puree half of the watermelon in a blender.
2) Put the pureed watermelon through a fine sieve into a 3 quart container to then be put into the freezer.
3) Repeat steps 1 and 2 to the other half of the watermelon.
4) Stir in lime juice and agave nectar.
5) Cover and freeze for at least 8 hours.
6) 1 1/2 to 2 hours before serving allow the frozen watermelon to sit at room temperature. Use large fork to scrape partially thawed watermelon into a glass.
7) Add 2/3 cup of Sprite to the glass. Garnish with a watermelon slice or a lime slice and serve.


I got a little excited and drank some before it was frozen. Although very delicious, it is better if in slushy form!

Thursday, July 5, 2012

BBQ Chicken Quesadillas

Quesadillas are the perfect summer dish, and are easy, versatile, and fun. Barbecue sauce adds a summertime twist to a traditional quesadilla. The original recipe called for Monterey jack cheese which would be fabulous, but I used cheddar cheese because it was in my fridge. Pepper jack cheese would also be a wonderful choice. Earlier in the week I posted another recipe, Spicy Posole Soup, that also featured the Santa Fe Salsa MX Marinade for prepping the chicken. I made two recipes from one session of prepping chicken, a bonus for efficiency.

BBQ Chicken Quesadillas
Recipe Adapted from Hyvee Seasons Magazine.

Ingredients for Two Servings:
(Image)
  • MX Santa Fe Salsa Marinade. This marinade flavor adds the perfect kick to the chicken.
  • 1 cup shredded or diced chicken
  • 4 flour tortilla shells (8")
  • 1 red bell pepper, chopped
  • 1 jalapeno pepper, chopped (optional)
  • 1/2 cup cilantro leaves plus more for garnish
  • 1/2 cup BBQ sauce plus more for serving
  • Fat-free plain Greek yogurt and lime wedges for serving

Directions:

1. Process the chicken in the Marinade Express using the Santa Fe Salsa Marinade for 20 minutes.
2. Cut chicken into bite-sized pieces. Cook in oven at 350 degrees for about 10 minutes. Make sure not to cook the chicken throughly because it will continue to cook in the quesadilla.
3. Sprinkle half the cheese on two of the tortilla shells. Add chicken, red pepper, jalapeno, and cilantro. Drizzle with 1/2 cup BBQ sauce. Sprinkle with remaining cheese. Top each tortilla with another tortilla.
4. I used my George Foreman to cook the quesadillas on medium heat. A griddle or pan will work just as well. Grill  until cheese is melted, about 3 to 4 minutes.
5. Cut the quesadillas into triangle wedges.
6. Serve with Plain Greek yogurt, BBQ sauce on the side, lime wedge, and cilantro for garnish. Some freshly made guacamole would be a wonderful topping also.


Tuesday, June 26, 2012

Spicy Posole Chicken Soup


This soup was easy and fast to make but the results suggested that I had been slaving over the stove all day. The broth is light and spicy; the ingredients are hearty and filling. It is a meal all-in-one with chicken and veggies; it is the perfect summertime soup.

Posole Chicken Soup
Recipe Adapted from Hyvee Seasons Magazine.

Ingredients for about 8 servings:
  • 1 Express (unflavored) Marinade (for carrots, pepper & cilantro below. See Direction 1).
(Image
  • 1 MX Santa Fe Salsa Marinade.This marinade adds the perfect spice to the chicken which accompanies the soup.
  • 32 ounces of low-sodium chicken broth
  • 2 (15.5 ounce) cans of white hominy, drained
  • 2 (14.5 ounce) cans of chipotle roasted tomatoes, undrained
  • 1 can chipotle peppers in adobe sauce
  • 3 cups chopped fresh cilantro
  • 1 teaspoon dried oregano
  • 28 ounces of skinless, boneless chicken
  • 3 tbs olive oil
  • 1 cup carrots, prepped as directed below, then sliced
  • 1 cup yellow onion, chopped
  • 1 poblano pepper, prepped as below, then seeded and diced
  • 2 avocados, chopped (optional)
  • 2 cups shredded Mexican or cheddar cheese
  • 2 cups plain Greek yogurt (optional)*

Directions:

1.  Prep unpeeled carrots, the poblano and cilantro using the unflavored Express Marinade for 5 minutes. This removes bacteria, dirt, and pesticides from veggies and fruits. You can eliminate the work of peeling the carrots and keep the flavor and nutrition. (I packed into the Marinade Express some red bell peppers and limes I had just bought to maximize my veggie washing use. I had previously done my cilantro and poblano and patted them thoroughly dry for refrigeration--the MX process makes them keep longer than normal--another bonus).

Look How Bright And Beautiful All My Veggies Are!
2.  Process the chicken in the Marinade Express using the Santa Fe Salsa Marinade for 20 minutes.
3. Cut chicken into bite-sized pieces. Cook in the oven at 350 degrees for 10 minutes. Make sure not to cook the chicken thoroughly because it will continue to cook in the soup.
4. In a large pot, add broth, hominy, tomatoes, 2 tsp adobe sauce and one cut up pepper (save any extra peppers for a future use). Also add cilantro and oregano.
5. In a large pan, heat olive oil. Saute carrots, onion and poblano pepper for about 5 minutes or until tender. Add the entire pan into the pot of soup.
6. Add all but 1 cup** of the cooked chicken into the pot and allow the soup to heat thoroughly.
7. Serve the soup topped with avocado slices, cheese, and Greek yogurt.*

Note: This soup freezes wonderfully. I ate two servings  and froze the remainder for another time. Also the next batch I make I think I will add some fresh corn right off the cob for one more dimension of flavor.

* Fat Free Plain Greek yogurt is a healthy replacement for sour cream. It has protein, no fat, and calcium in it. I love sour cream on anything and since I have made the switch to Greek yogurt I don't notice a difference in taste, yet I know I am making a healthy choice.
** I made a second mouthwatering summertime dish with the Santa Fe Salsa chicken-- BBQ Chicken Quesadilla. (To be posted shortly).

Spicy Posole Chicken Soup

Friday, June 22, 2012

The Marinade Express Makes the Front Page!

The Marinade Express and my dad made the front page of the Janesville Gazette, my parents' local newspaper in Wisconsin. The article is titled "A Cleaner Catch". It discusses the research that UW- Whitewater has conducted to show that the Marinade Express removes contaminants and mercury, a harmful chemical found in food fish. Click here to read more about this magical process and how one mom  making baby food using the Marinade Express has helped her baby to have a healthy childhood. This article is wonderfully written and hits some of the main benefits the Marinade Express has to offer. It was a real treat to see the Marinade Express and my dad on the front page of the Janesville Gazette!

My Dad With Some Components of The Marinade Express (Image)

Thursday, June 14, 2012

Crab in Tarragon Cream With Puff Pastry Shells

As I have previously mentioned, my mom went on a grocery shopping spree. She went a little overboard with buying mangoes, limes, and crab. In my last post I gave my mom's delicious recipe for Crab Cakes. My mom created the following recipe as a way to use up the rest of her crab meat.It was creamy and bold, like an elegant crab pot pie. The peppers and peas made it fresh and bright. The Pepperidge Farm puff pastry crusts, flaky and easy to bake, gave something to soak up all of the delicious juices. This recipe is a Maureen original and if you love crab as much as we do this recipe is a must-try!


Ingredients for Crab in Tarragon Cream with Puff Pastry Shells-  6 servings

Vegetables prepped in the Marinade Express: 
  1 small red pepper
  8 oz. mushrooms
  1 c. fresh shelled peas
  1/4 C. fresh tarragon leaves (or 2 Tb. dried)
1 small red onion, diced
2 Tb. butter or oil for sauteing
1 lb. lump crab meat
3 Tb. butter 
3 Tb. flour 
1 C. vegetable broth
1 C. light cream or Half & Half
2 beaten egg yolks
12 Pepperidge Farm frozen puff pastry shells.

Directions: 

1.Using the Express unflavored MX marinade and both divider ribs, place the red pepper and mushrooms on one side of the divider ribs and the fresh peas and fresh tarragon leaves on the other side. Rotate for 4 minutes.Remove from the drum and pat dry.Set the peas and tarragon leaves aside. 
2. Dice the red pepper, mushrooms and red onion and gently saute them in butter or oil until softened. Set them aside.
3. Using your choice of the Garlic Butter, Garlic and Herb, or unflavored MX Marinade mix, prep the crab meat in the Marinade Express, placing the crab meat in a mesh lingerie bag dedicated for cooking use, if desired. Use both divider ribs.Give the crab 3 or 4 rotations in the appliance, then let it rest, atop the dividers, out of the liquid for about 10 minutes. Then open the drum and carefully remove the crab. If you did not use a mesh bag, you may want to use a colander to avoid losing any of the crab meat. Refrigerate the crab as you prepare the other ingredients.
4. In a deep heavy saucepan, melt the 3 Tb. butter over low heat. Gradually stir in the 3 Tb. flour and cook for 3 minutes. Slowly stir in the 1 C. vegetable broth. Cook and stir with a wooden spoon or wire whisk until thickened and smooth. Slowly stir in the 1 C. light cream and heat through. Add a small amount of the heated sauce to the 2 beaten egg yolks, stirring, then add the mixture to the remainder of the heated sauce, stirring until the sauce thickens. Add the peas, crab meat, sauteed mushrooms, red pepper and onion. Snip the fresh tarragon leaves and stir them in, until all ingredients are heated through.
5. Prepare the frozen puff pastry shells according to package directions, and ladle the crab sauce over the shells and serve immediately.     

Friday, June 8, 2012

Crab Cakes

During the Mango Salsa Weekend my mom also bought some crab meat in bulk and to use it up she made some scrumptious crab cakes. These little patties were packed with tons of flavor and had a crunchy, crumbly crust. The crab meat was processed in the Marinade Express resulting in even more tender crab. This dish was another one that the Mango Salsa accompanied perfectly.


Ingredients for 12 Crab Cakes:
1 pound lump crab meat.
1 small red bell pepper.
3 green onions
1 c. fresh breadcrumbs, divided ( we used Brown Rice by Hol-Grain)
1/4 c. mayonnaise
2 eggs, beaten
1/4 c. cilantro or parsley
1-2 tsp. Old Bay seasoning (optional)
3 Tb. vegetable oil, divided

Directions:
1. Please read direction # 1 in the Mango Salsa Weekend for instructions on prepping peppers, the onions,  and cilantro or parsley in the Marinade Express. If prepping the vegetables only for this recipe, you can do them all together, with the pepper and green onions on one side of the divider ribs and the herbs on the other.

After prepping the vegetables in the Marinade Express, pat them dry and finely chop them, keeping the cilantro or parsley separate from the red pepper and onions.

2. Heat 1 Tb. oil in a large skillet over medium heat. Cook pepper and onions 3 minutes, until slightly softened.Transfer them to a large bowl.

3. Select a MX Marinade (see suggestions below) and prep the crab meat in the Marinade Express, using a mesh lingerie bag dedicated for kitchen use if desired. Do only 2 to 3 rotations, then let the crab rest atop the dividers, out of the liquid, for 10 minutes.

MX Marinades especially tasty for this recipe include Chipolte Lime, Cajun, Garlic Butter, or Garlic & Herb. You may want to use less or no Old Bay seasoning if you use a flavored MX mix. Or use the unflavored Express MX Marinade.

4. Open the drum and carefully remove the crab, then dump out the water.(Use a colander if you are worried about losing any of the crab meat.)

5. To the bowl of sauteed pepper and onion, add 2 Tb. breadcrumbs, the chopped cilantro or parsley,
and the remaining ingredients except crab and oil. Mix well. Gently blend in crab and form into 12 patties.

6. Place the patties on a baking sheet and sprinkle with half the remaining breadcrumbs. Turn patties over and sprinkle with the rest of the breadcrumbs.

7. Cover and refrigerate at least 1 hour or up to 24 hours before cooking.

8. Heat remaining oil and saute 4 patties at a time, 3-4 minutes per side until golden. Keep cooked crab cakes warm in the oven as you saute the remainder.

9. Serve immediately, accompanied by Mango Salsa, alone, or with any sauce of your choice.


Sunday, June 3, 2012

Chili-Crusted Flank Steak

In my previous post, "The Mango Salsa Weekend," I shared with you the story of how my mom got carried away with buying so many mangoes that she made an abundance of Mango Salsa. We discovered that the mango salsa accompanied a variety of dishes. This Chili-Crusted Flank Steak was surprisingly tender and juicy on the inside because it was processed in the Marinade Express. The spices on the outside created a fabulous crust of flavor. The sweetness of the mango salsa added a perfect note of sweetness to the chili- crusted flank steak. This recipe is a must-try.

Chili-Crusted Flank Steak
Recipe adapted from Joy of Cooking. 3-4 servings

Ingredients:

1 beef flank steak (about 1 1/2 pounds)
2 Tb. ground dried ancho chili peppers, or chili powder
2 Tb. cracked black peppercorns
1 1/2 Tb. ground cumin
1 1/2 Tb. coarse sea salt

Directions:

1. Prep the steak in Marinade Express for 20-40 minutes, using your choice of the Signature Steak or Fajita or unflavored Express MX Marinade. Remove the steak and pat dry.
2. Combine the 4 seasonings in a small bowl and rub the entire surface of the steak with the spice mixture.
3. Grill or broil 3 1/2- 4 minutes per side for medium-rare. Make a small incision and check the center; it should be slightly less done than desired; it will continue to cook somewhat off the heat. Remember that meat and fish prepped in the Marinade Express usually cook 20 % faster than normal because of the increased juiciness.
4. Remove the steak from the heat and let stand for about 5 minutes. Thinly slice it across the grain. Serve immediately, topped with Mango Salsa.


Friday, June 1, 2012

The Mango Salsa Weekend

To kick-start my Memorial Day weekend I went home to visit my parents for two days. My dearest mother always gets excited for my visits; she makes so much delicious food I am convinced that her goal is to weigh me down so that I can't return to Dubuque. As much as I enjoy the array of meals that my mom makes, and she is a fabulous cook, she got a little carried away on her menu this past weekend.
(Image) Mango

It all started with an innocent shopping spree that my mom and her girlfriends went on. My mom found a good citrus juicer and a mango splitter with me in mind. I adore mangoes. Their silky, sexy texture and sweet taste is to die for. Now that my mom had purchased a mango splitter she knew that she needed some mangoes to use this slick device on. Next she ventured off to Sam's Club in search of some ripe mangoes. She discovered that she could buy a whole box of about 14 mangoes for a cheaper price than a smaller amount of mangoes. Then she decided to make an abundance of mango salsa with the ripe mangoes. The recipe called for a lot of fresh lime juice, so off to the store in search of limes she went. This story is beginning to remind me of the classic children's book, When You Give  A Mouse A Cookie. Limes just happened to be 10 cents per lime, which is a very good deal. My mom bought 30 limes to make sure she had enough lime juice for the mango salsa. When I came home and saw that the kitchen was buried in mangoes and limes I told my mom that she needs to go to Grocery Shoppers' Anonymous!
Mango Splitter. (Image)


Although my mom might have a slight addiction to grocery shopping, her mango salsa was absolutely scrumptious-- the sweet, silky mangoes, fresh cilantro, tangy red onions, a bite from jalapenos, and of course the tart lime juice. I was surprised how many dishes the mango salsa accompanies perfectly: we had Chili-Crusted Flank Steakpork chops (like the ones I previously made), and crab cakes. All were surprisingly delicious with the mango salsa as a topping. I also think some cinnamon pita chips dipped in the mango salsa would be a divine snack. After our mango salsa feast I enjoyed two perfectly ripe mangoes eaten directly off the cutting board. I don't think I'll ever get tired of mangoes.

Mango Salsa

Recipe adapted from Joy of Cooking


Ingredients: (About 6 cups). Note: "Normal" shoppers can cut this recipe in half.

1 large red onion, chopped
1/2 c. fresh lime juice (squeezed from about 6-7 small limes after prepping in Marinade Express)
2-3 large ripe mangoes, peeled, pitted, and chopped (about 4 c.)
1 large red bell pepper, chopped after prepping in Marinade Express
3/4 c. chopped fresh cilantro (prep first in Marinade Express, before chopping)
2 cloves garlic, minced
1/2 c. fresh orange juice
2 fresh jalapeno peppers, finely chopped after prepping in Marinade Express
Salt and cracked black peppercorns to taste

Directions:

1. Prep the limes, peppers and cilantro in Marinade Express, using the unflavored Express Marinade for fruits and vegetables. This will eliminate most surface bacteria and pesticide residue. This was especially important since we were going to use our new citrus squeezer, in which the juice washes over the lime rinds in the squeezing process. Limes and peppers can be prepped together, using both divider ribs, placing limes on one side of the divider and peppers on the other. Prep the more fragile cilantro in a second batch (but you can put lettuce or other greens needed for another use on the other side of the divider ribs for the sake of efficiency.) Rotate for about 4 minutes.

Pat dry the limes, peppers, and cilantro before juicing or chopping for this recipe. Thoroughly dry any extra fruits, vegetables, or greens before storing them in the refrigerator, and they will keep longer than normal, because Marinade Express eliminates nearly all the spoilage-bacteria that was present.

2. In a large bowl, combine the chopped onion and lime juice. Peel and chop the mangoes and other ingredients (see hint below about cilantro), setting them aside, then add all together to the onion mixture and stir well.

3. Serve immediately. Salsa will keep, covered and refrigerated, for one day. Hint: if you only add as much cilantro as needed for the serving size immediately required, the salsa keeps longer. Just put in fresh cilantro each time you serve the salsa; we did that and were enjoying the salsa for 4 days with various menu items.


Tuesday, May 29, 2012

Refreshing Corn and Fennel Salad

My favorite menu item for a get-together is a dish that is simple, easy, colorful, and something new for the taste buds to experience. On Mother's Day we ended up having a little get-together in Dubuque. My parents drove the two hours from Wisconsin and we celebrated with Paul and his parents. Since my place with four roommates isn't equipped for such a formal gathering, Paul's parents invited us to spend the day at their lovely house. The event was our idea so we brought a majority of the food to cook on their grill. Although my parents did most of the work in Wisconsin I made an easy, healthy, refreshing corn and fennel salad as they were on their way. This side dish was colorful and satisfying. I highly recommend making this for summer picnics, graduations, family reunions, or any occasion since its flavors will accompany anything.

Refreshing Corn and Fennel Salad

Bright and Colorful!


Corn and Fennel Salad
Adapted from Food Network's Money Saving Meals With Sandra Lee

Ingredients:
2 cups frozen corn, thawed. (fresh corn, cooled, would be even better)
1 Granny smith apple, cored and chopped
1 fennel bulb, quarted, cored, and thinly sliced
1/2 medium onion, chopped
3 tablespoons cilantro, chopped
1 teaspoon ground cumin
Salt and pepper to taste
1 tablespoon apple cider vinegar
1 tablespoon spicy brown mustard
1/2 cup olive oil

Directions

1) In a large serving bowl combine corn, granny smith apple, chopped fennel, chopped onion, and cilantro. Mix together.
2) In a small bowl mix cumin, salt and pepper, vinegar and mustard. Whisk the olive oil in slowly so the vinaigrette doesn't separate.
3) Add the vinaigrette to the salad; coat the salad. Best if chilled for a half hour before serving to allow the flavors to marinate the salad.
4) Garnish with a few sprigs of cilantro right before serving.

It's So Attractive in this Lovely Glass Bowl!

Wednesday, May 23, 2012

Lean and Juicy Cilantro and Jalapeño Burgers

Last weekend Paul and I went on our annual camping trip with some friends. Instead of having traditional hot dogs I whipped up some tasty burger patties that we cooked over a grill plate on the bonfire. Processing the ground beef in the Marinade Express makes the meat light and extra juicy, but without being greasy. This recipe is something that I came up with because of what I happened to have on hand.  A lot of cilantro adds a freshness which mixes perfectly with the spice of the jalapeños. Of course you can mix and match your own flavors but this recipe was so delicious, I had to share it. We loved them so much that we made them for dinner again the following night.

Ingredients:
1 lb of lean ground beef
1-2 tbs of garlic, minced
2 tablespoons (or more) of fresh cilantro, minced,
1 tablespoon of onion, minced. (I used white but any kind would work).
1 Jalapeño, minced (remove all or some seeds depending on your spice preference).
Salt & pepper to taste
1 egg, to bind the beef
Sliced cheese of choice, for topping
Sliced tomato, for topping
Spinach leaves, for topping
Whole wheat buns
Raw Patties. Notice The Gorgeous Cilantro!


Directions:
1) Process the ground beef in the Marinade Express using Santa Fe Salsa MX seasoning. Make sure your beef is tightly packed together. Be careful to only allow the Marinade Express to rotate 3 to 4 times, otherwise the  beef will begin to fall apart. It doesn't take very long for the Marinade Express to work its magic. Stop the drum unit so that the beef is outside of the water. Let it stand for 10 minutes to let the water drain from the beef. Then carefully remove the beef and dump out the water. (Use a colander if you are worried about losing some of the ground beef.)

2) In a large mixing bowl add ground beef, garlic, cilantro, onion, Jalapeño, salt & pepper. Using your hands, get messy and mix all of the ingredients into the beef together.

3) In a separate bowl crack one egg and whisk until frothy. Add the egg to the beef mixture. Mix the egg with your hands into the beef.

4) Flatten the beef evenly into the bowl. Use your hand to divide the beef into fours; this will help you to make evenly-sized patties. Take each section and pat tightly into a patty shape.

5) Grill, bake, or fry  the burgers on a pan until cooked as desired . I prefer some pink in my burgers and after using the Marinade Express it is safe to do this, as up to 99.5 % of all bacteria is eliminated!

5) Top the burger with a slice of cheese-- we used Munster but any will be delicious--, top with a slice of tomato and spinach. I used whole wheat buns because they are healthier and tastier. These burgers were so flavorful and juicy I didn't use ketchup and mustard for my second serving! For the veggies I whipped up a side of sautéed asparagus minus the mushrooms; view my recipe here.

Building My Burger High!

The Finished Product Ready To Eat!